Planning to go camping in Torres del Paine on your trek? Here’s what you need to know.
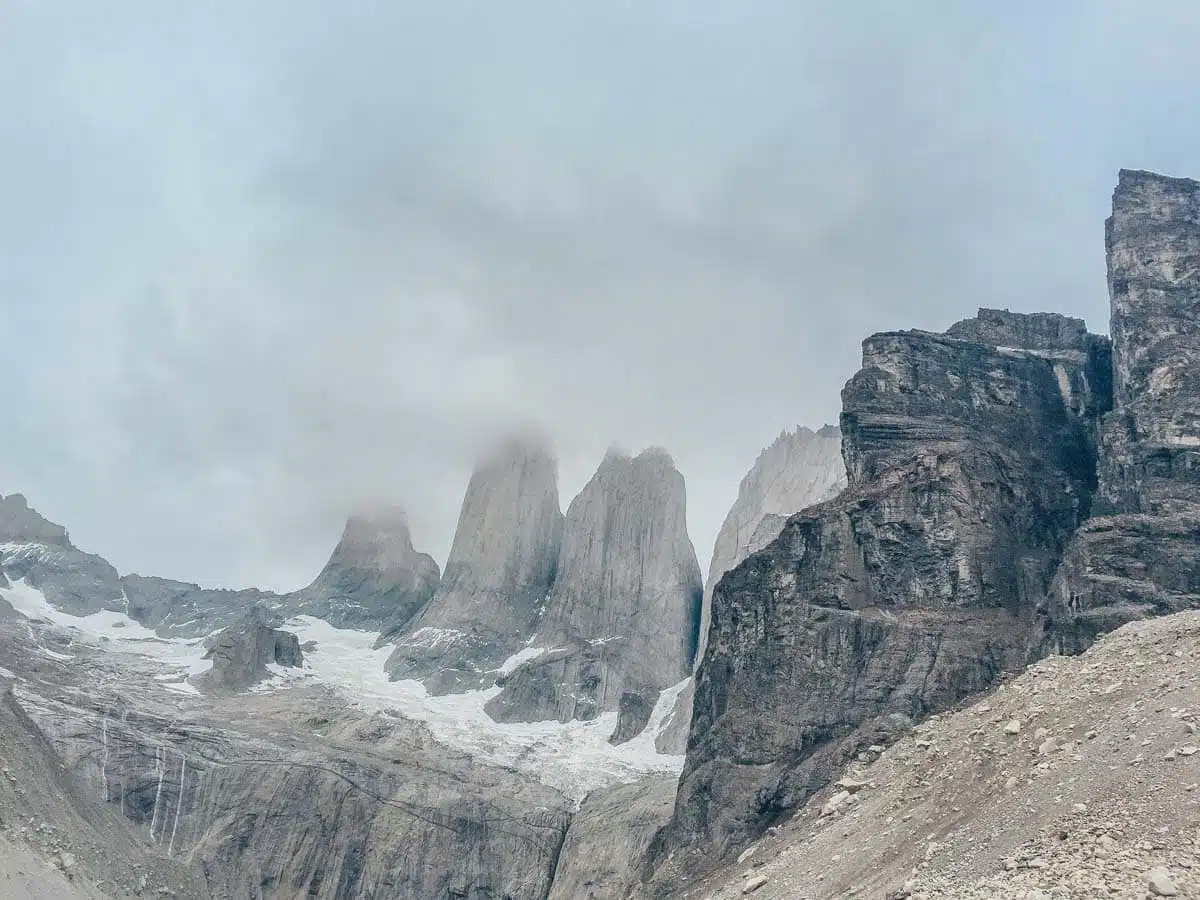
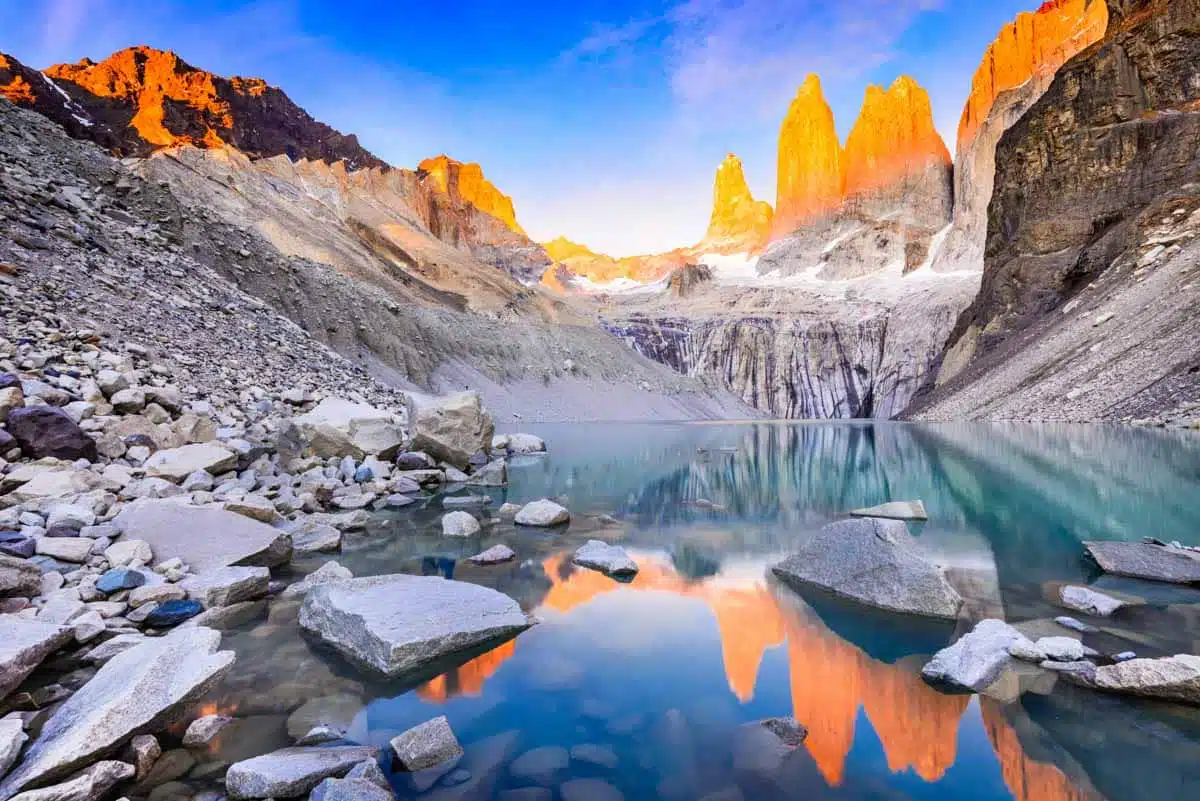
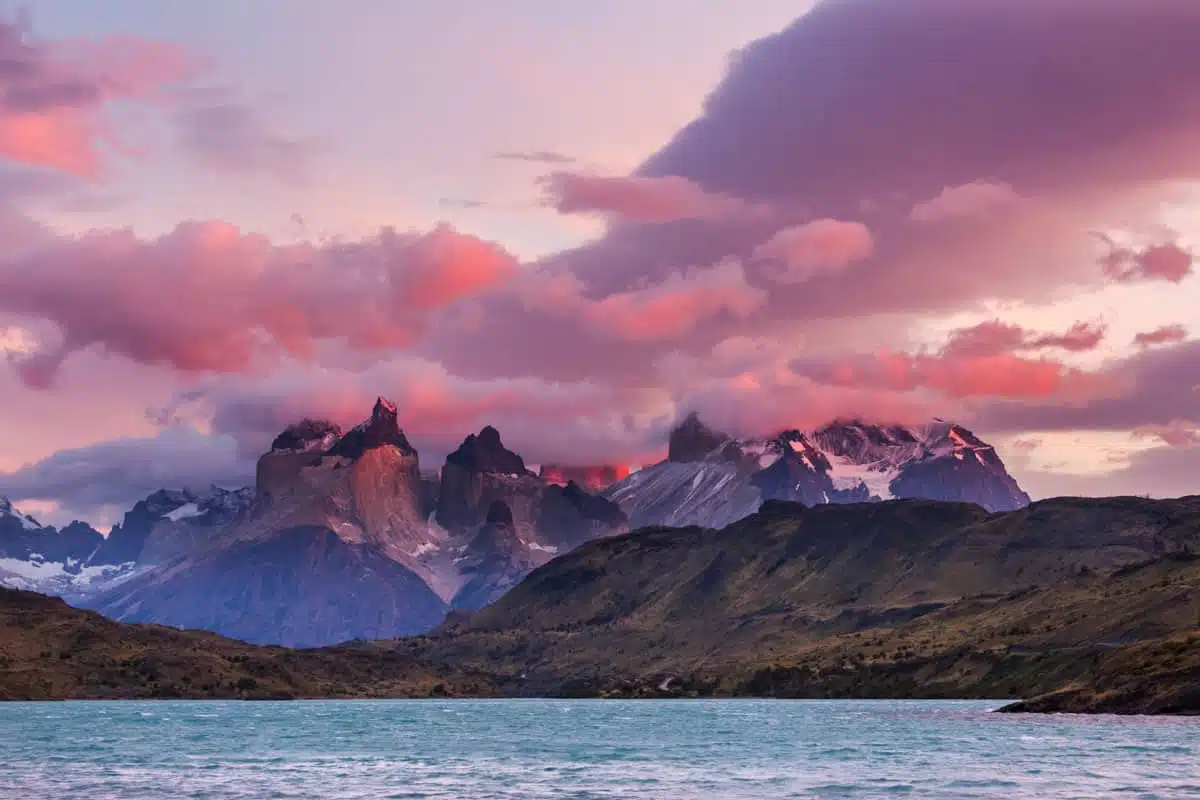
There’s a reason why trekking and camping in Torres del Paine National Park are becoming increasingly popular each year: this place is stunning.
Like the kind of stunning you think is photoshopped, but it’s actually real. And despite the fact that tourist numbers are growing each year, Torres del Paine isn’t any less magical.
In fact, it’s a good thing that more and more people are excited about Torres del Paine, as long as visitors continue to respect the park and follow the rules.
However, the influx of hikers and campers in Torres del Paine means that if you want to visit the park, you need to be prepared and plan your trip far in advance.
Gone are the days of being able to show up at the park and standby at campsites; you now need to have your reservations fully sorted before entry.
If you’re willing to plan ahead, camping in Torres del Paine is an incredible and unique experience.
I may be biased, but I think that multi-day trekking is the #1 best way to see and experience Torres del Paine. And, by default, if you aren’t planning on staying in expensive refugios during your trek, you’re going to be camping in Torres del Paine.
Many hikers and visitors were confused and frustrated AF about the systems and processes needed to book campsites in Torres del Paine, so I wrote this whopper of a guide with every last detail you need to know about booking and staying in every campsite in the park.
Hopefully, if you’re reading this right now, you’re ready to plan and book your trip a couple of months in advance. If not, skip ahead to the “what to do if you haven’t booked anything and your trek starts tomorrow” section.
Get out your notebook and pen (or online notebook and keyboard) and get ready for this ultimate guide to camping Torres del Paine! I promise that it’s not as intimidating as it seems if you plan ahead and stay persistent.
Important Things to Know Before Camping in Torres del Paine
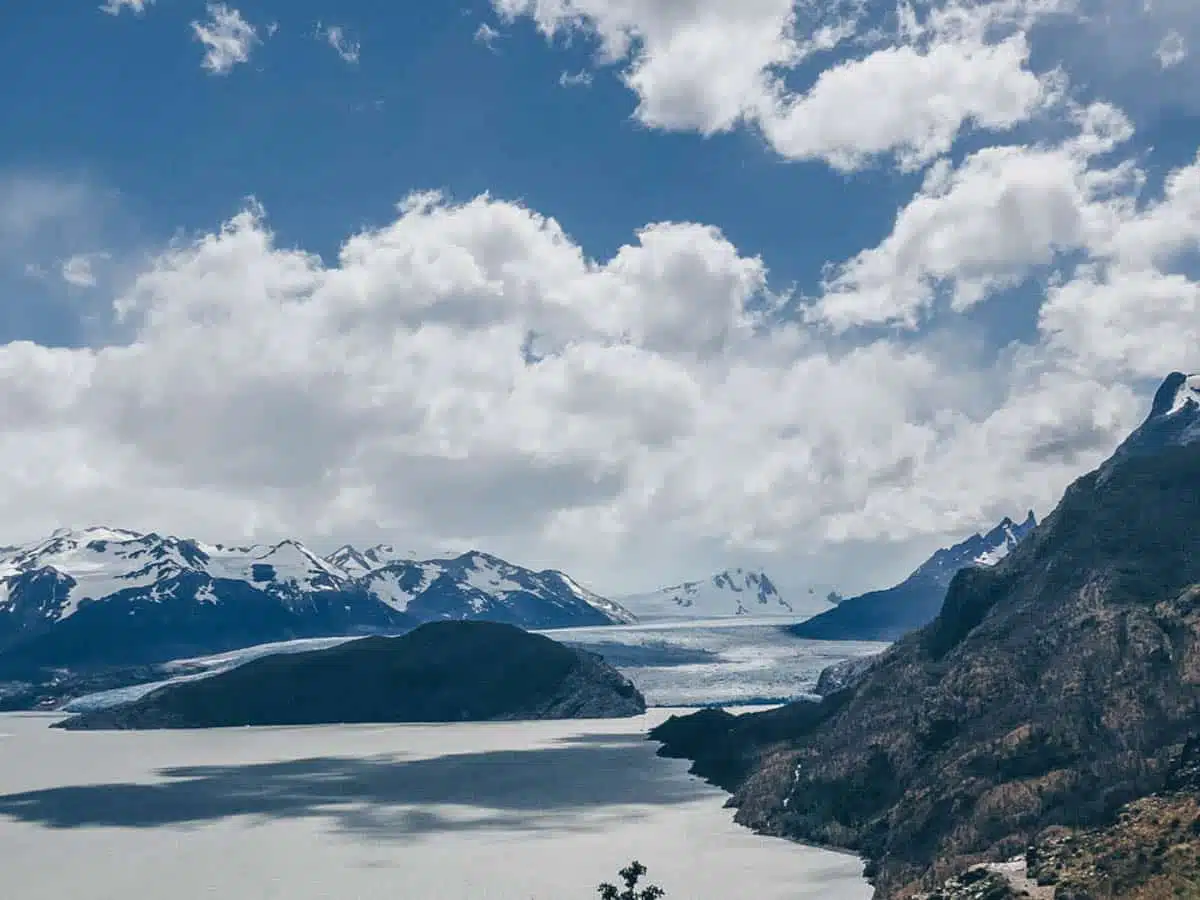
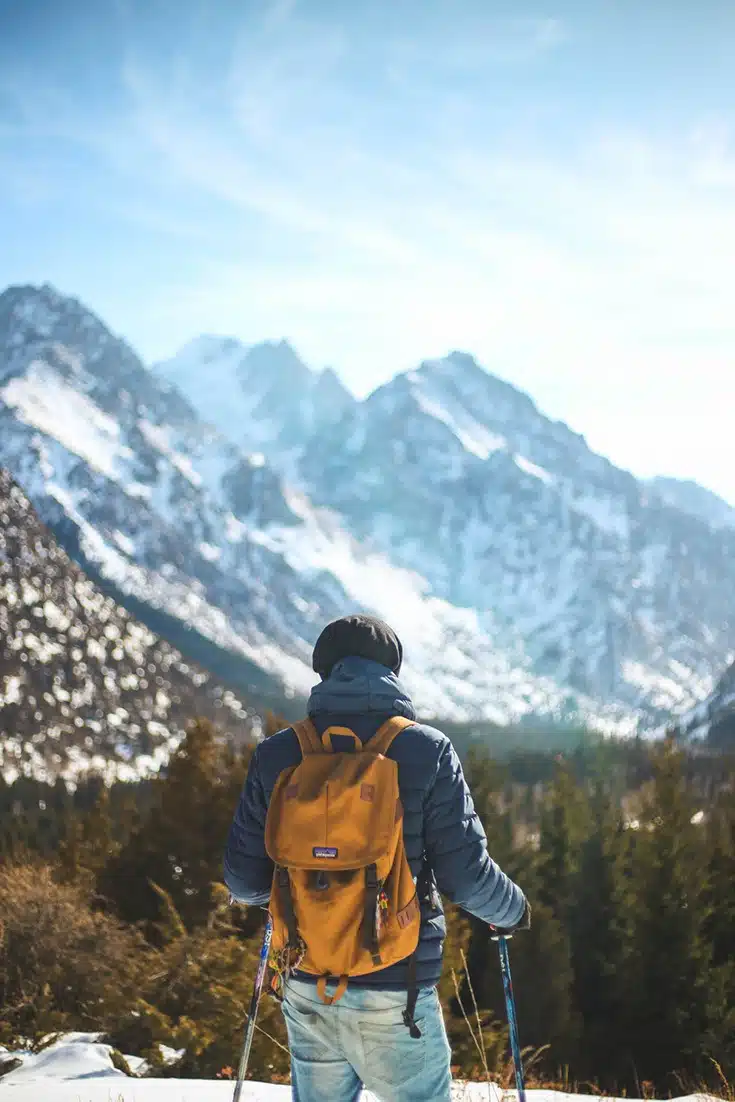
Patagonia’s allure comes from the its majestic mountains and landscapes. One of the best ways to experience this wild beauty is by completely immersing yourself in it.
Camping in Torres del Paine enables you to do just that: pitch a tent, listen to the sounds of the earth, and sleep in the center of this wild and beautiful place.
Travel Insurance
If you’re going to be doing any trekking or adventure activities, we always recommend buying travel insurance before your trip.
I use and recommend WorldNomads travel insurance for all of my international travel – it has literally saved my life and protected me in some very sticky situations.
Do yourself (and everyone who loves you) a favor and buy travel insurance before your trip.
Book Campsites
You MUST book all campsites well in advance. There’s no hard and fast rule for how far in advance you should book, but they do fill up a few weeks or months ahead of time, especially during the high season.
Be sure you make all of your reservations as early as possible in order to ensure your spot.
Don’t Start on a Monday
Try your best to not start your trek on a Monday.
Why? Because virtually the entire city of Puerto Natales is closed on Sundays, meaning if you need any last minute equipment, food, etc., you might be SOL.
Additionally, some of the camping companies and bus line offices are closed and you won’t be able to schedule anything with them if you’re there on a Sunday.
Go to the Erratic Rock Talk
Attend the 3 o’clock talk at Erratic Rock Hostel. This is a daily orientation to the park run by experts, which goes over the trekking routes, what to bring, weather conditions, and a long Q&A session.
Solo trekkers can meet up with others to coordinate their trek and sync up with other solo hikers.
Be Prepared for All Kinds of Weather
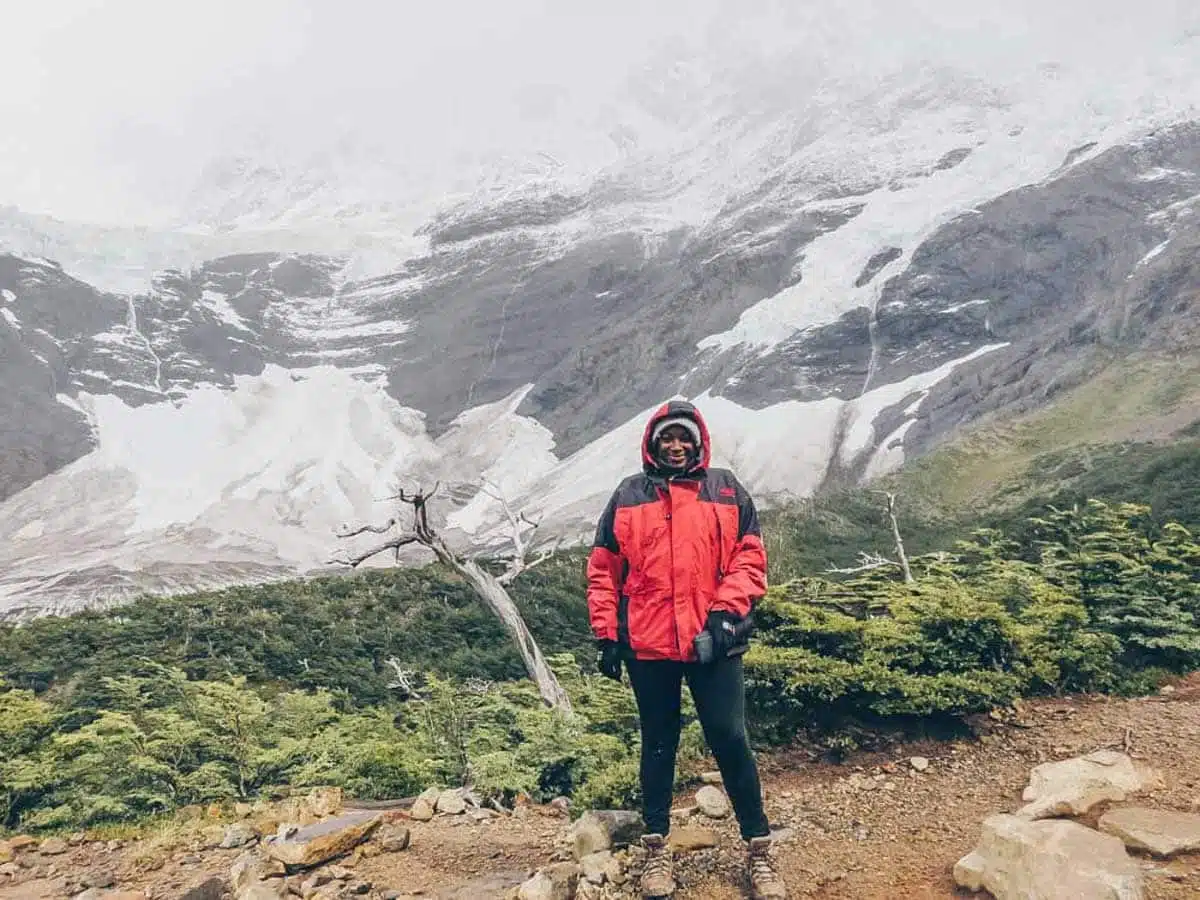
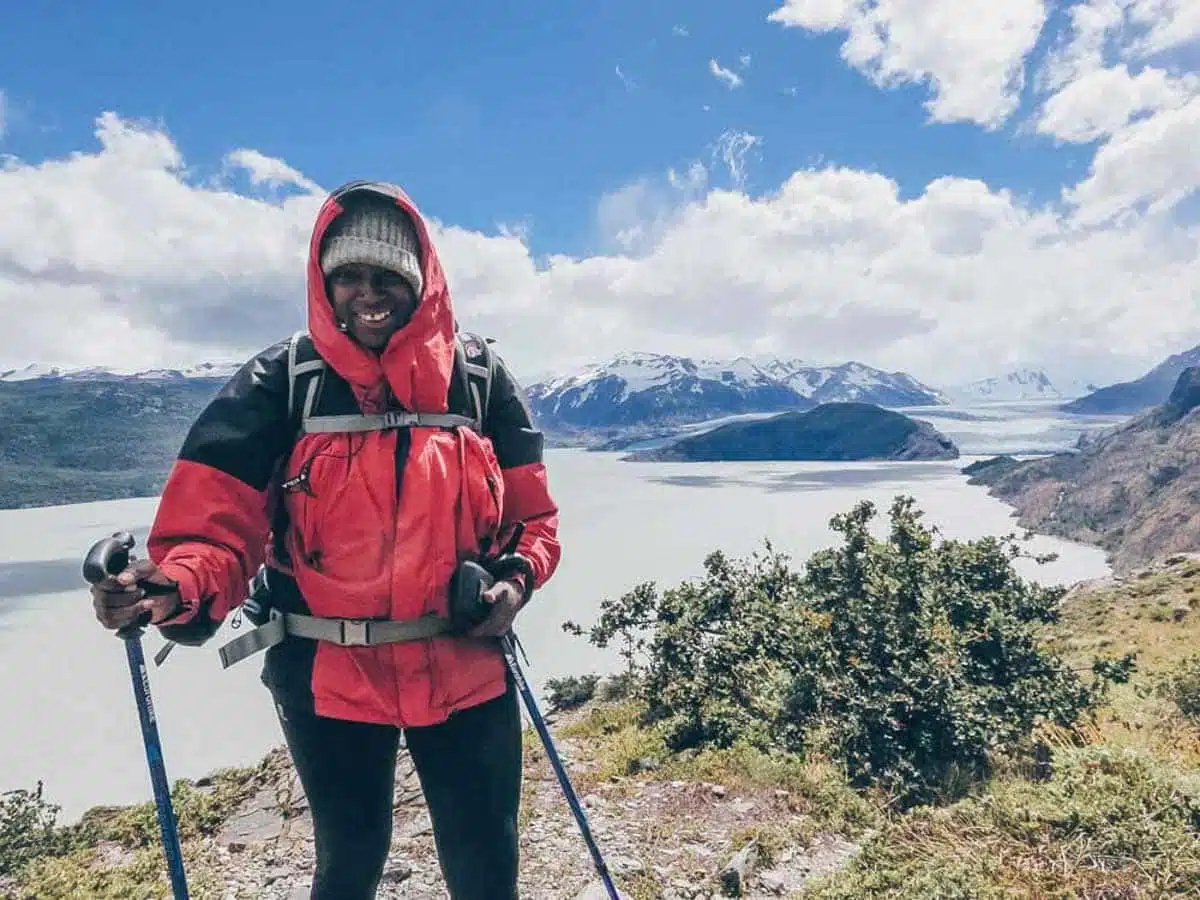
The weather in Torres del Paine is super unpredictable. I went camping in Torres del Paine for the first time in November, the “off season,” and the weather was literally perfect.
I went again in February, the “high season,” and the weather was awful.
No matter what, bring LOTS of waterproof equipment and plastic bags to keep your important items (e.g., sleeping bag, clothes, sleeping mat) dry in your bag.
Protect Your Gear
Protect your gear and food from wildlife. My boyfriend had his bag chewed through by hungry field mice on the very first day of our O Trek. The mice smelled his SEALED bag of walnuts and attacked while we were sleeping.
Aside from mice, condors, pumas, and foxes are also problematic in Torres del Paine – be sure to store your food properly and avoid putting anything scented inside your backpack or tent!
When to Go Trekking & Camping in Torres del Paine
Whether you’re tackling the W Trek or the longer O Trek, choosing the right time of year to go is critical for planning a memorable and safe trip.
Summer in the Southern Hemisphere lasts from late November through February, with the warmest months in December and January.
Pro tip: Most trekkers visit Torres del Paine during the height of the Chilean summer – December through February. However, I heard from several local sources in Patagonia that in recent years, the mildest weather has occurred in November and early March.
In my own experience, the weather in November was much, much more stable and beautiful than when I returned in February. This is totally anecdotal advice, however, so don’t assume that every trip will be this way. Take it or leave it…
When to Go Hiking & Camping on the W Trek

As Torres del Paine’s most popular trekking route, the W trek is open year-round to trekkers. The high season for this 4-5 day trek is from October to the following March. During this time, the trails and campsites are fully open to hikers.
During the summer, you definitely don’t need a guide for the W Trek. The trails are clearly marked with signs and well-maintained pathways.
There are also several other hikers around at all times, and you literally cannot miss the campsites when you pass by them. I hiked the W solo in November of 2016 (without a guide) and had no problems syncing up with fellow hikers or navigating around the trails and campsites.
If you opt to visit Torres del Paine in the winter, however, you’ll need a certified trekking guide to be able to enter the park.
During this time, weather conditions can be variable and downright hostile, but if you are brave and willing to stick it out, you can do a guided W Trek in the winter and stay in the refugios along the way.
When to Go Hiking & Camping on the O Trek
The O Trek is only open during Chile’s summer months – mid-November through mid-April.
This is because the backside of Torres del Paine is a lot more remote and inaccessible than the W trek, and the weather conditions back there can be much more volatile. Outside of these months, the O Trek areas are closed.
There are mixed recommendations for when the best time to do the O trek in Torres del Paine is, but I recommend going in late November or December. However, even during high season, you still may experience cold, wet, or windy conditions.
When we did the O Trek in February, we experienced beautiful, sunny weather on some days and ice, sleet, rain, and high winds on others.
Needless to say, it was beautiful, adrenaline-inducing, and terrifying all in one. But that’s what makes for some the best travel experiences, right?
What to Bring on a Torres del Paine Camping Trip: The Basics
While I could write an entire novel on everything you should pack for camping in Torres del Paine, I thought we’d spare you this time and just give you a list of the basics. (But don’t worry – I’ve also written a step by step guide!)
Personal Gear to Bring When Camping Torres del Paine
A comfortable backpack: You’re going to be walking up to 13 miles (21 kilometers) per day, so you’re going to need the most comfortable backpack possible that takes the weight off your shoulders.
If you’re planning on bringing your camping equipment with you, I’d recommend getting a 60-70 liter backpack.
Both times I went trekking in Torres del Paine, I used my Osprey Ariel 65 and felt like a million bucks, so I’d highly recommend getting that one if you’re in the market for a new hiking backpack.
Two sets of clothing: For both the W Trek and the O Trek, we recommend bringing two sets of clothes – one for trekking and one for sleeping.
Depending on your tolerance for cold, we’d recommend bringing several merino wool or synthetic layers that you can pull on and off depending on the weather conditions.
Women: Fleece jacket – Long sleeve – Short sleeve – Tank top – Leggings
Men: Fleece jacket – Long sleeve – Short sleeve – Leggings
Thermal and waterproof shells: Because the weather is so unpredictable, you should have some comfortable outerwear to trek in and sleep in. For multi-day treks, I swear by my Patagonia packable down puffer and my Marmot rain jacket.
Sturdy, waterproof hiking boots: Even if the weather is nice during your entire trip, you should wear waterproof hiking boots while you trek.
Why? Because you’ll need to cross muddy trails and cold streams nearly every single day. I’ve used these amazing waterproof hiking boots for over 4 years and I love them to death. Don’t forget a few pairs of thick wool trekking socks too!
Toiletries & a quick dry towel: One of the nice things about the campsites in Torres del Paine is that most of them have lukewarm hot water, which means you can take a nice, refreshing shower at least once every two days.
Don’t forget your toiletries (I prefer the solid variety since, ya know, we’re in a national park and plastic isn’t cool) and a quick dry towel.
Critical Camping & Hiking Gear
A lightweight tent: I recommend the Big Agnes Copper Spur HV UL2 for all backpacking and camping excursions – it’s one of the lightest and most durable tents out there!
Sleeping bag and thermal sleeping mat: If you’re wondering what kind of sleeping bag to bring with you, follow two criteria: it should be a) lightweight and b) warm. I have a Kelty Cosmic Down that I bring basically everywhere with me and it was great for backpacking in Torres del Paine!
Lots of backpacker meals or lightweight food: We sampled a variety of backpacker foods and definitively decided that our favorite brand was Backpacker’s Pantry. They have tons of different flavors you can bring along with you (our favorite was the Three Sisters Stew), and all you need to do is add boiling water!
Cooking supplies: You’ll need a packable cooking pot, stove, gas cannister, and silverware to cook your meals. I forgot silverware during my first time camping in Torres del Paine, and guess who ended up having to eat her food with her hands/a stick?
Eco-friendly soap and a quick-dry scrubber: Be sure to get eco-friendly soap (I love CampSuds) and a scrubber so you can clean your dishes after every meal.
Lots of recyclable plastic bags: Bring as many recyclable plastic bags as you can. They don’t give them away at stores in Puerto Natales, so I’d recommend bringing them from home. Not only can you use them to pack up your dry stuff and protect it from rain, but you can also use them to carry out your trash from the park.
Where to Rent Equipment for Camping Torres del Paine
In Puerto Natales, there are several places where you can rent camping and hiking gear, ranging from tents and sleeping bags to stoves and cookware to trekking poles.
Many people recommend Erratic Rock for equipment rentals, and while they’re great, I’ve found that their gear can sometimes be a bit worn out. They are the most popular hub for all things trekking, after all!
Both times I’ve gone to Torres del Paine, I’ve rented my gear from Carfran Patagonia. Located just off the main road of Puerto Natales, it’s one of my favorite gear shops in the city.
They have awesome stuff you can rent and really reasonable prices, and there’s never a wait or a line in there to talk to a sales rep. Here’s their gear rental and price list page. In addition to gear rentals, they also sell everything you might want to buy, from silverware and cups to beanies and rain gear.
Routes for Trekking in Torres del Paine
Before you can make your campsite reservations in Torres del Paine, you’ll need to determine what your route is and plan it out by date.
We’ve included 3 different itineraries for the W Trek and one itinerary for the O Circuit so you can choose the best one for your dates and timing.
Once you’ve chosen the best route, be sure to write down the dates and overnight stays on a piece of paper. You’ll need this information for when you book your campsites in Torres del Paine in the next section!
W Trek Routes for Torres del Paine
Condensed Version: W Trek in 3 Days
If you’re strapped for time, you can experience most of what the W has to offer. However, you’ll be hiking longer distances each day and stopping for less time at the landmarks.
In this itinerary, you’ll cut out Grey Glacier and instead head to Mirador Britanico and Mirador Torres.
Day 1 – Paine Grande to Mirador Britanico to Frances/Cuernos: You’ll take the 7:00 AM bus from Puerto Natales to Pudeto, then take the 11:00 AM catamaran from Pudeto to Paine Grande. From Paine Grande, you will begin walking directly to Campamento Italiano to drop your things off for the day hike to Mirador Britanico.
After the day hike, you’ll grab your stuff and walk over to either Frances or Cuernos campsites, depending on how much farther you’d like to walk that day. Overnight in Frances or Cuernos.
Day 2 – Frances/Cuernos to Chileno: On this day, you’ll hike from either Frances or Cuernos to Chileno, where you’ll spend the night. Overnight in Chileno.
Day 3 – Chileno to Mirador Torres to Puerto Natales: Your last day begins with a sunrise hike to the Mirador Base Torres. You’ll then hike back down to Chileno, grab your stuff, and then walk to Torres Central to catch the bus back to Puerto Natales.
*You can also reverse this route, starting at Torres Central and working backwards. You can also add in Grey Glacier and cut out Mirador Britanico, but I loved Britanico and it would be a real bummer to miss it, especially if the weather is nice.
Classic Version: W Trek in 4 Days
The Classic version of the W Trek in Torres del Paine ensures that you hit all of the main attractions on the front side of the park.
These include Grey Glacier, Mirador Britanico, and the Mirador Base Torres. Many people choose to do the 4 day version as a compromise – they shave off one extra day and still get to see all of the main highlights.
Day 1 – Paine Grande to Grey to Paine Grande: Take the 7:00 AM bus from Puerto Natales to Pudeto, then the 11:00 AM catamaran to Paine Grande. From Paine Grande, you’ll take a day hike up to Grey Glacier (4 hours each way, 8 hours return). Overnight in Paine Grande.
Day 2 – Paine Grande to Mirador Britanico to Italiano/Frances/Cuernos: From Paine Grande, you’ll head to Italiano then leave your stuff at the ranger station for the day hike to Mirador Britanico.
When you return, you’ll either set up camp at Italiano or continue on to Frances or Cuernos, depending on your energy levels and the amount of comfort you’re seeking. Overnight in Italiano/Frances/Cuernos.
Day 3 – Italiano/Frances/Cuernos to Chileno: You’ll spend the entire day hiking from your campsite to Chileno, passing by beautiful lakes and views of Los Cuernos. Overnight in Chileno.
Day 4 – Chileno to Mirador Torres to Torres Central to Puerto Natales: Rise and shine early in the morning (like 3:30 AM early) and hike up to the Mirador Base Torres for sunrise. Then, head down, grab your bags at Chileno, and hike down to Torres Central to catch your bus back to Puerto Natales.
*You can also reverse this route, starting at Torres Central and working backwards.
Complete Version: W Trek in 5 Days (Recommended)
This was the itinerary the first time I visited Torres del Paine, and I loved being able to take the trails a little slower and enjoy the beautiful landscapes in the park for a day longer.
If you have enough vacation days, I strongly recommend taking this route – you’ll get to experience the W Trek to the fullest without feeling rushed.
Day 1 – Paine Grande to Grey: You’ll start this day by taking the 7:00 AM bus from Puerto Natales to Pudeto, then catching the 11:00 AM Catamaran to Paine Grande.
From there, hike up ~4 hours to Grey Campsite. Be sure to line up immediately when you arrive in Pudeto or you may not be able to get on the Catamaran. Overnight at Grey.
Day 2 – Grey to Paine Grande:After spending the night at Grey, you’ll hike ~3-4 hours back to Paine Grande. Before you go, you can hike up towards Paso campsite to see some massive hanging bridges that boast amazing views of Grey Glacier. Also, be sure to stop by the Grey Mirador on your way out, too. Overnight at Paine Grande.
Day 3 – Paine Grande to Mirador Britanico to Italiano/Frances/Cuernos: Head towards Italiano, drop off your stuff, then hike up to Mirador Britanico. Afterwards, head back and set up camp in Italiano or continue on to Frances or Cuernos to shorten your next day. Overnight at Italiano/Frances/Cuernos.
Day 4 – Italiano/Frances/Cuernos to Chileno: This hike is a long one from Italiano/Frances/Cuernos to Chileno, the nearest campsite to the Mirador Base Torres. Overnight at Chileno.
Day 5 – Chileno to Mirador Torres to Torres Central to Puerto Natales: Before sunrise, head up to Mirador Torres. Then, pick up your stuff in Chileno and head back to Torres Central to take the bus. Return to Puerto Natales.
*You can also reverse this route, starting at Torres Central and working backwards
Read Next: Complete Guide to Trekking the W Torres del Paine
O Trek Route for Torres del Paine
Start at Seron (Recommended)
There are really only two ways to do the O Circuit, since you are required to go counter-clockwise. The first is starting at Seron (which I personally did and recommend).
Starting on the Backside
Day 1 – Puerto Natales to Torres Central to Seron: Take the 7:00 AM bus from Puerto Natales to Laguna Amarga, then take a shuttle to Torres Central. From there, you’ll find the Seron trailhead behind and to the right of the campsite. Here, you’ll begin trekking until you reach Seron. Overnight in Seron.
Day 2 – Seron to Dickson: From Seron, you’ll hike all day (~6-7 hours) to Dickson campsite. Side note: I think this is literally the prettiest campsite in the entire park! Overnight in Dickson.
Day 3 – Dickson to Perros: Wake up and head to Perros campsite. You’ll pass by rushing rivers, evergreen forests, and hanging glaciers on your way to Perros. Overnight in Perros.
Day 4 – Perros to Paso: This is one of the trickiest days of the O Circuit. From Perros, wake up early and head up to the John Gartner Pass.
Once you’ve crossed the pass, you’ll continue downhill until you reach Paso campsite. Some people choose to continue on to Grey, but it’s another 3-4 hours and we were already exhausted when we reached Paso. Overnight in Paso.
Entering the W Trek Area
Day 5 – Paso to Grey: This is an easy, 3-4 hour day. Once you’ve eaten breakfast, head towards Grey. You’ll pass 3 hanging bridges which are terrifying to cross but gorgeous. Grey Glacier will constantly be peeking out from behind the trees during your trek. Overnight in Grey.
Day 6 – Grey to Paine Grande: Today’s hike is a leisurely downhill from Grey to Paine Grande, past some nice lookout points. Overnight in Paine Grande.
Day 7 – Paine Grande to Mirador Britanico to Frances: This is my favorite day of the entire hike (if the weather is good). Hike to Italiano, drop your stuff, then hike back to Mirador Britanico. Then, pick up your stuff and hike for one more hour to Frances. Overnight in Frances.
Day 8 – Frances to Chileno: From Frances, you’ll hike the entire day to Chileno. It’s a leisurely hike for most of the day, but make sure you take a left at the “Chileno Shortcut” to cut down your time hiking. Overnight in Chileno.
Day 9 – Chileno to Mirador Torres to Puerto Natales: Your last day! Wake up early for sunrise, head up to the Mirador Base Torres, then descend down to Torres Central to catch the bus back to Puerto Natales.
*You can also start the O Trek at Paine Grande and work your way around counter-clockwise. I advise against this because a) you’ll have to pay for the Catamaran twice, and it is expensive, and b) because you do the W before the backside (and the backside is significantly harder). In my opinion, it’s better to start with the backside first to get it done while you still have lots of energy in the beginning.
Camping Torres Del Paine: Booking Your Campsites
CONAF
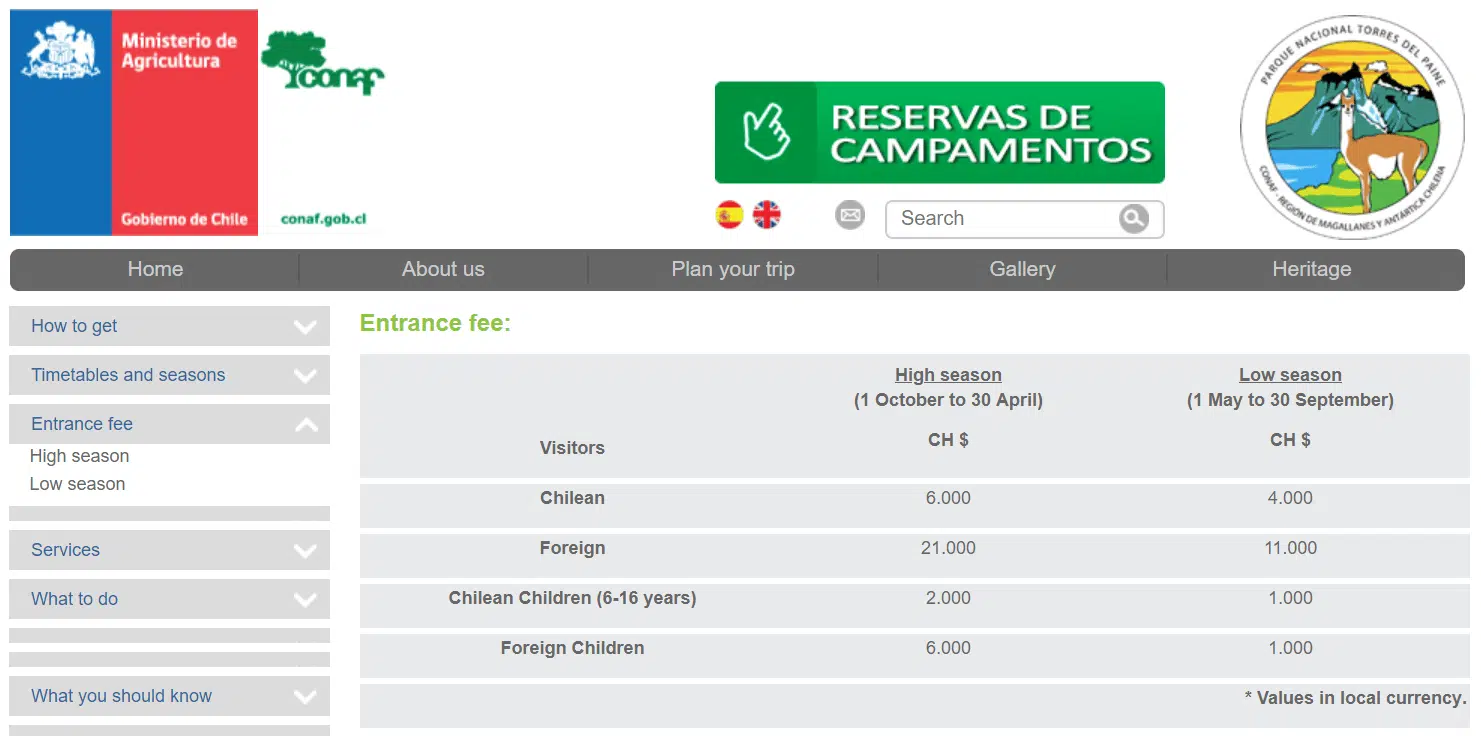
CONAF is the national parks service in Chile, and they’re the organization responsible for running and maintaining Torres del Paine National Park. They kind of have an English version of their website, which you can find here.
On their website, you can book the free CONAF campsites as well as purchase your park tickets in advance. Park entrance costs 21,000 CLP for foreign adults, 6,000 for kids, and 6,000 for Chilean residents.
To book your campsites and pay for your entrance ticket, click the big green button like in the photo below:
Once you’ve booked your campsites and purchased your ticket, I’d strongly recommend printing them out for entry into the park. I’ve heard conflicting stories from different sources about whether your park tickets need to be printed, so it’s best to play it safe and print them at your hostel or hotel beforehand.
Vertice
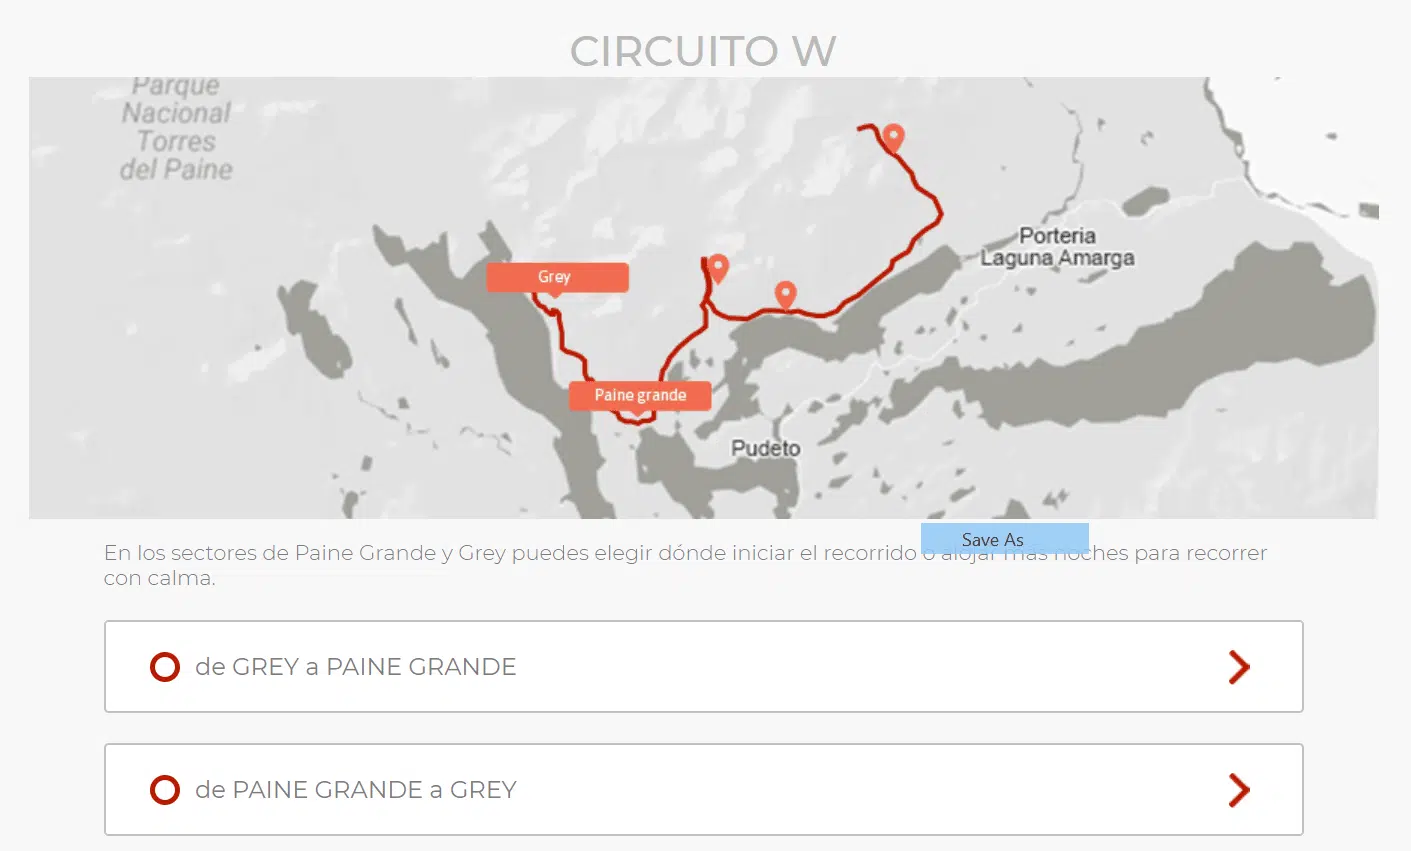
Vertice is a private company that manages the campsites and refugios on the North and West sides of the park: Dickson, Perros, Grey, and Paine Grande. In order to stay at any of these campsites, you’ll need to make a reservation through Vertice.
These are generally cheaper than Fantastico Sur and typically consist of tent camping with a few equipment rental spaces. In Vertice’s campsites, you’ll find a small check in area and store, hot showers, running water, and a kitchen/cooking area.
You can book the campsites, refugios, equipment rentals, and meals on their website. The booking interface is fairly easy to use. You’ll choose whether you’re doing the O or the W trek, then you’ll choose the campsites and dates afterwards. See below for an example:
Pro tip: At any given point, Vertice’s reservations website may or may not be working, so if you have trouble accessing the reservations or finalizing your booking, I’d strongly recommend emailing them your dates and desired campsites.
FWIW, both times I went to Torres del Paine, I struggled with Vertice’s online booking system so much that it made me want to chuck my computer out the window.
Don’t do that. Just email them instead.
Fantastico Sur
Of all of the campsites in Torres del Paine, Fantastico Sur’s are the nicest, but they’re also by far the most expensive. Many of them have strange rules about cooking, which means you’ll be required to buy a partial or full board plan (which can run you up to $80 per day…yikes!).
As of March 2019, here’s what we know:
- Frances, Cuernos, and Chileno are wooden platform camping.
- Chileno requires you to buy full board for both their refugio and their campsites. I’ve heard rumors that they are trying to build a cooking shelter, but both times I went to Torres del Paine, it was like this.
- Cuernos, Chileno, and Torres Central have refugios, while Frances and Seron have eco-domes and tents only.
- All campsites have hot showers and a meal service.
To book, head to the Fantastico Sur website and click on the slightly inconspicuous red button on the right side of the homepage labeled “Book Now”:
From there, you’ll be taken to the booking page for ALL of their campsites and refugios, where you can make individual bookings. Their date system is a little bit confusing, so make sure to double and triple check the dates on your reservation to make sure they are correct.
Again, the Fantastico Sur website can sometimes be a little buggy or just flat out refuses to cooperate. If this happens to you, contact them directly at [email protected] to get your campsites sorted out.
Arrival in Torres del Paine: What to Expect
Leaving Puerto Natales
Most buses to Torres del Paine from Puerto Natales leave sometime between 7:00 and 7:30 AM. You’ll need to head to the bus station a day or two before to reserve your bus ticket.
There are probably half a dozen bus companies that service Torres del Paine. Erratic Rock will recommend Bus Gomez, but we disliked them for a number of reasons during our most recent trip.
Personally, I’d recommend going with Bus Sur, which always gave us really good service, ran on time, and was comfortable and clean. All buses leave from the Rodoviario Puerto Natales.
You’ll want to grab a ticket for the 7:00 AM bus so you can get in line for the entrance sooner. However, getting a 7:00 AM ticket doesn’t actually guarantee that you’ll get on the 7:00 AM bus (We know, we had 7:00 AM tickets and got booted to the 7:30, meaning we ended up being the last of the park entrants that morning…that sucked. Don’t try it.)
To actually ensure you’re on the 7:00 AM bus, I recommend getting to the station no later than 6:40 AM.
Entering the Park
This should be really straight forward because everyone has to do it, but unfortunately, entering Torres del Paine is a chaotic, disorganized mess. Hang in there, I promise that the park is worth the initial frustration!
First of all, remember what your bus and driver look like if you’re going to Pudeto. If you’re headed to Laguna Amarga, get your stuff off the bus and carry it with you in the line.
Once you (and all 10 other 7:00 AM buses) arrive at the entrance to Torres del Paine, a park ranger will enter the bus and give you instructions for how to proceed.
Generally, this means getting in a long AF line, watching a short video about fire safety in the park, and then proceeding to buy your ticket.
Yes, you still have to wait in the long AF line if you bought your ticket online. (Insert sad face emoji here.)
Once you pass into the room with the cashiers, people who bought tickets online can skip past them to the final checkout place, where a ranger will hand you a park map and send you on your way.
The park map is your BFF. DON’T LOSE IT. If you haven’t bought your ticket yet, the second room is the place to do so, and as of March 2019, you could only pay in cash.
Pro tip: They don’t let you bring backpacks into the cashier room, so set yours down on the porch outside before entering or you’ll have to leave the line and get in the back. Yes, this happened to us.
If you’re heading to Laguna Amarga (Torres Central or Seron), you’ll bring all your stuff from the entrance and catch a local shuttle (3,000 CLP, cash only) to the trails.
For those heading to Pudeto for the catamaran (Paine Grande or Grey), head back to your bus (I hope you haven’t forgotten which one was yours…?) and continue on to the pier.
Checking Into Campsites
There wasn’t a single campsite (CONAF, Vertice, or Fantastico Sur) where we needed to have our reservation printed out. I’d say it’s safe to have your reservations screenshotted or saved onto your phone for campsite check-in. You’ll usually also need to provide your passport(s) and put a tag onto your tent.
Generally, it’s a good idea to try and get to campsites earlier in the day so you can snag an awesome spot, but it’s not necessary. Just make sure you don’t arrive after dark.
A Complete Guide to All of the Campsites in Torres del Paine National Park
W Trek Torres del Paine Campsites
If you’re planning on trekking the W, you can complete it in anywhere from 3-5 days, depending on how quickly you hike and where you choose to stay.
There are two options for starting the trek: the west side (Lago Grey) or the east side (Torres Central). The itineraries in the previous section are a loose estimate of the routes that hikers typically take on the W trek.
In this guide, we’ve provided details on each campsite so you can choose where to stay and plan your route. For ease of reading, this guide starts with Grey and works through the campsites counter-clockwise.
Grey
- Description: A charming campsite and refugio located near the Grey Glacier lookout point.
- Booking Company: Vertice
- Amenities: Hot showers, kitchen area with running water, shop, computers with Internet for paid use, camping equipment available for rent
- Refugio? Yes
- Cost: Campsites are 5,000 CLP ($8 USD) per person; refugio beds start at ~22,000 CLP ($35 USD) per person
Situated next to Grey Glacier, this campsite is located in a partially wooded area at the foot of a beautiful rocky mountain.
Here, you can find a check in area, a small store, and some computers with Internet that you can pay to use. There’s also a kitchen area with running water and “hot” showers. (When I was there they were VERY lukewarm…just a warning.)
I’d recommend getting there as early as possible as the campsite is really long and some of the camping areas are quite far from the bathrooms and kitchen. If you prefer the peace and quiet, cool! But if you’d rather have the luxury of choice, lace up those hiking boots and get hustling.
Pro tip #1: Treat yourself to some delicious hot food and drinks (of the alcoholic variety, or not…up to you) at the Grey Refugio! It’s gorgeous inside, with wooden beams, big windows, and cozy couches you can sit on while you snack and sip.After 3 PM, they sell pizzas, hamburgers, prix-fixe-style dinners, wine, cocktails, and beer. It’s not cheap, but after a few days of hiking, it sure is worth it.
Pro tip #2: If you’re up for an adventure, book a kayaking or glacier trekking tour on Grey Glacier with Bigfoot Adventures. I’ve tried to do this every time I’ve gone, but sadly the weather never seems to cooperate. However, it’s worth making a booking and crossing your fingers for calm weather! (They don’t make you pay for cancelled trips.)
Paine Grande
- Description: Windy lakeside campsite with a large lodge & refugio, ample cooking space, and a wide tent camping area.
- Booking Company: Vertice
- Amenities: Hot showers, large kitchen area with running water, indoor cafeteria and bar with food for purchase, WiFi (paid), camping equipment available for rent
- Refugio? Yes
- Cost: Campsites are 6,000 CLP ($10 USD) per person; refugio beds start at 33,000 CLP ($55 USD) per person
Located right next to the Catamaran stop, this is a typical stop for people who want to take a day hike to Grey Glacier (about 7-8 hours round trip from Paine Grande). Surrounded by mountains and grassy fields, it is a pretty introduction to the park for those just arriving on the catamaran.
This campsite has all of the necessary amenities, from hot showers to a massive indoor kitchen and dining area. The refugio also has a coffee shop, convenience store, cafeteria, and bar.
Paine Grande is located right next to the lake, which means that the sunrises here are pretty freakin’ epic as they illuminate both Paine Grande and Los Cuernos mountains.
Pro tip #1: It’s not uncommon to see a fox (or two, or five…) wandering around here and there. They’re friendly, don’t worry! But don’t offer them food or try to pet them. They are wild animals and often come to the campsites in search of food, and it’s not cool to feed them.
Pro tip #2: If you’re low on food and need to restock, Paine Grande has the best convenience store in the park. They sell lots of snacks and cookable foods like couscous, hot dogs, pasta, sauces, and more. There’s also a large cafeteria with meals and snacks and a bar with cocktails, beer, wine, and pastries if you get lazy and don’t feel like cooking.
Italiano
- Description: A rudimentary campsite in a pretty forested area by a river. Some campsites have direct views of Paine Grande mountain, which is pretty cool.
- Booking Company: CONAF
- Amenities: Drop toilets, outdoor cooking area with picnic tables
- Refugio? No
- Cost: Free (with reservation)
Although basic, Camping Italiano is located in one of the best places in the entire park. Situated right next to Paine Grande’s massive glaciers and a running stream, this campsite is a fantastic place to rest for the night if you don’t need fancy amenities. The best part? It’s FREEEEEE.
If you are backpacking with your tent, Italiano is a fantastic place to stop because it will help you cut down on costs. However, there are no camping gear rentals available here, so if you aren’t traveling with gear, I’d recommend choosing Frances or Cuernos instead.
Pro tip: Grab a spot by the river. It’s amazing to drift off to sleep with the sound of the water running and glaciers cracking in the distance.
Frances
- Description: A wood platform-based campsite and refugio located between Italiano and Cuernos.
- Booking Company: Fantastico Sur
- Amenities: Hot showers, cooking/dining area, camping equipment available for rent
- Refugio? Yes, including Eco Domes
- Cost: Campsites cost 13,000 CLP (~$20 USD) per person; refugio starts at 68,000 CLP (~$105 per person)
Camping Francés is a wooded campsite with platform camping located in between Paine Grande and Los Cuernos. This is a fantastic place to rest if you’re looking for upgraded amenities from Italiano, like an indoor dining area or hot showers. Within the campsite, there are also eco “domos” and a refugio.
Here, you can find wooden platforms to pitch your 1-person or 2-person tent. There’s also a cooking area for campers to cook with gas and a stove.
Pro tip: Choose Frances (or Los Cuernos) if you’re planning to hike to Chileno the next day. It’s only ~1 hour from Italiano and you’ll be able to shorten the long trek to Chileno. Plus you’ll have access to a hot shower and running water, which you’ll definitely want after your scramble up to Mirador Britanico.
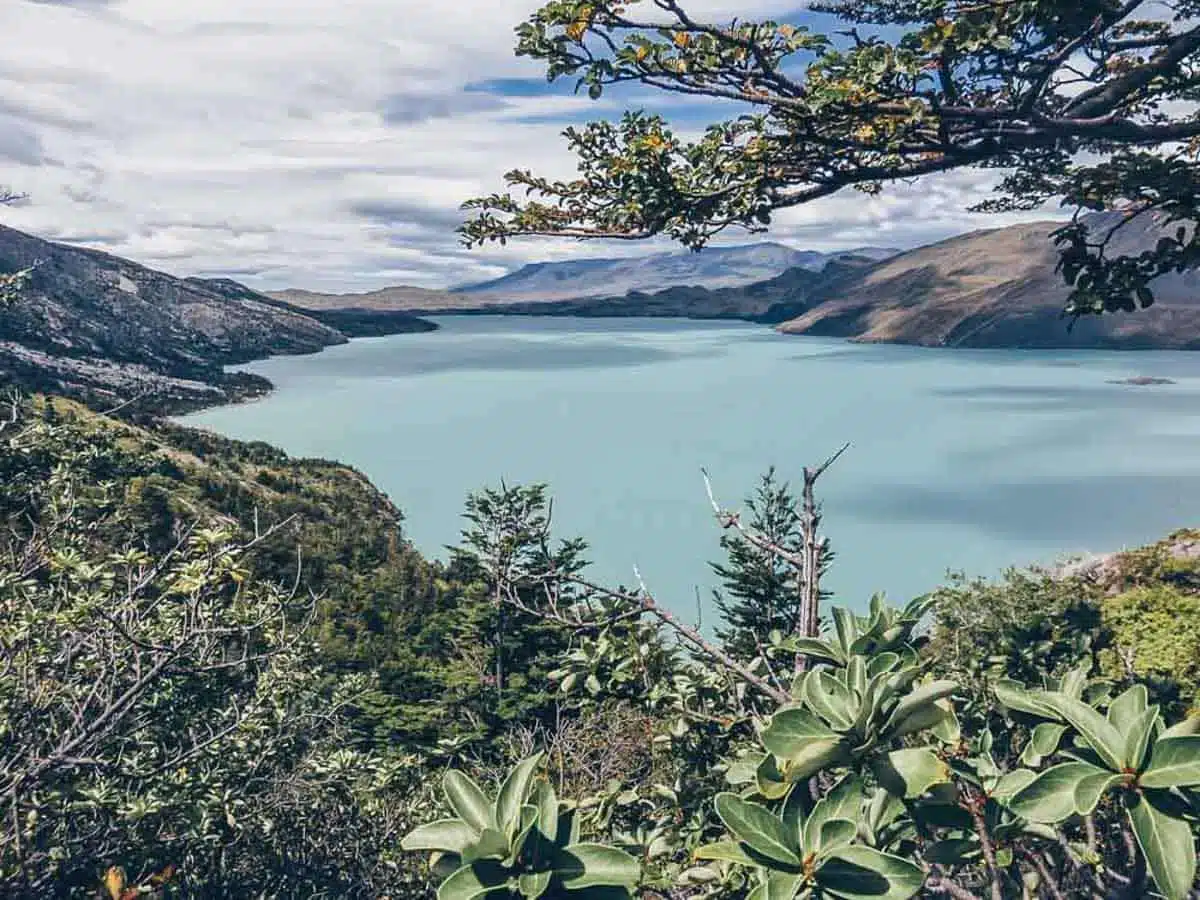
Los Cuernos
- Description: The most beautiful campsite and refugio on the W Trek in Torres del Paine, located right next to the Los Cuernos rock formations.
- Booking Company: Fantastico Sur
- Amenities: Hot showers, running water, cooking/dining area, small shop, camping equipment available for rent
- Refugio? Yes
- Cost: Camping costs 13,000 CLP (~$20 USD) per person (plus $11 single supplement if you’re a solo hiker); the refugio starts at 68,000 CLP (~$105 USD) per person
Right next to one of the park’s most iconic rock formations, Los Cuernos campsite is one of the most central places to go camping in Torres del Paine National Park. It’s also arguably the most beautiful of the W campsites, located right between Los Cuernos mountains and Lago Nordenskjold.
There’s a beautiful wooden refugio here with a spacious indoor dining area that you can use if you buy food from their cafeteria. Historically, you could not cook at Los Cuernos, but they’ve recently changed the rules! Now, they have a cooking area for campers and you can cook using your gas and stove.
Pro tip: Stay here. Just do it. Before our plans got foiled the last time I was in Torres del Paine, I was planning to stay here. I was super bummed when we had to evacuate the park the day before we arrived at Los Cuernos. It’s a beautiful campsite and it’s worth it.
Torres
- Description: Rustic campsite at the base of the Torres del Paine Mirador
- Booking Company: CONAF
- Amenities: Drop toilets, outdoor cooking area
- Refugio? No
- Cost: Free (with reservation)
If you’re hoping to reach the Torres del Paine mirador at sunrise, this is the best campsite to choose. It’s a free CONAF site, so don’t expect anything too luxurious, but it’s a cozy, wooded campsite in a super peaceful and quiet location.
Coming from Italiano/Frances/Cuernos, it’s a bit of a hike to get up here. After you reach Chileno, it’s still easily another 1-1.5 hours fully packed to reach this campsite. However, if you’re hoping to catch a glowy, gorgeous sunrise the next morning, the pain miiiiight be worth it.
Although it’s bare bones, the campsite is less than an hour from the mirador, meaning you can wake up at 5 AM and make it up there in time to see the Torres burn bright red in the morning sun.
Chileno
- Description: Cozy campsite and refugio with wood platform camping and hot meals
- Booking Company: Fantastico Sur
- Amenities: Hot showers, WiFi (paid), hot meals upon request
- Refugio? Yes
- Cost: Camping costs 13,000 CLP (~$20 USD) per person (plus $11 single supplement if you’re a solo hiker); the refugio starts at 68,000 CLP (~$105 USD) per person. You are also required to purchase full- or half-board to camp here.
Located on the trail leading from Torres Central to the Torres del Paine mirador, Camping Chileno is currently the closest campsite to the Torres del Paine Mirador (as the Torres campsite is closed).
At the campsite, you’ll find the best hot showers in the entire park (my personal opinion), a pretty, wooden indoor dining area with hot meals, and cozy camping platforms to pitch your tent. At Chileno, you currently have to purchase full- or half-board with your campsite reservation, as cooking isn’t allowed here.
You can still hike to the mirador at sunrise from Chileno, although you’ll need to leave around 3:30 AM to make it in time. I’ve done it and it wasn’t too bad of a hike, just make sure you have a headlamp as it is still pitch black outside until a few minutes before the sunrise!
Camping Torre Central
- Description: Large campsite near the Visitor’s Center near the trailhead for the O/W Treks
- Booking Company: Fantastico Sur
- Amenities: Hot showers, running water, outdoor cooking area, shop, Wi-Fi access (paid), access to Torres del Paine Lodge restaurant & both refugios
- Refugio? Yes (Torre Norte & Torre Central)
- Cost: Camping costs 13,000 CLP (~$20 USD) per person (plus $11 single supplement if you’re a solo hiker); the refugio starts at 68,000 CLP (~$105 USD) per person
This campsite is located right next to the Torres del Paine Lodge and the Torre Norte/Central refugios, and has all of the necessary amenities, including hot showers, cooking areas, and WiFi (for an extra fee).
Since it’s so large and there’s a lot of foot traffic from the trails, refugios, and the lodge, this campsite can be a bit more noisy and crowded than some of the others. However, it’s really convenient and has the most amenities out of all of the places to go camping in Torres del Paine, so the trade off is worth it.
If you don’t feel like cooking, the restaurant and bar at the Torres del Paine Lodge are really nice and reasonably priced, considering you’re out in the middle of nowhere. This is the perfect option for those looking to spend just one night in the park, and take a day hike up to the Torres del Paine Mirador.
Seron
- Description: A large campsite located in an open field; usually the first stop for people doing the O Circuit.
- Booking Company: Fantastico Sur
- Amenities: Hot showers, running water, cooking and dining area, indoor dining, small shop, camping equipment available for rent
- Refugio? No, but there are Eco Domes available
- Cost: Campsites cost 13,000 CLP (~$20 USD) per person
O Trek Torres del Paine Campsites
If you’re hiking the O Circuit, Seron will most likely be your first stop. It is located about 5-6 hours from the Torres Central campground. Located in a wide open field, Seron has plenty of space to pitch your tent and settle in for the night.
Seron includes a small check-in area and shop, a restaurant, a tented cooking/dining area and bathrooms with hot showers. For people without camping gear, there is camping equipment available for rent here.
When you arrive and check in, you’ll be given a green tag to put on your tent. Personally, I’d recommend getting a camping space that’s somewhat close to the main cabin/bathrooms.
There’s a decent bit of wildlife that roams around here at night and I prefer to be as close as possible to the things I need when it’s dark out!
Pro tip: BEWARE OF MICE AND CONDORS! My boyfriend had a huge issue with mice here that ended up chewing through the side of his backpack and stealing our walnuts. In the morning, we woke up to condors in the campsite scavenging for food. Protect your food by hanging it in sealed plastic bags on the inside of your tent (above the ground).
Dickson
- Description: Idyllic lakeside campsite on a peninsula, situated between some really stunning snow-capped mountains
- Booking Company: Vertice
- Amenities: Hot showers, running water, indoor cooking area, shop, refugio with meal service
- Refugio? Yes
- Cost: 5,000 CLP ($8 USD) per person
The second stop on the O Circuit is Camping Dickson, located about 20 kilometers (6-8 hours) from Serón. When you arrive at this campsite, you might feel a little disgruntled because of the steep hill (and SUPER steep downhill) leading up to its entrance.
However, once you get there, you’ll realize why this is often quoted as one of the most beautiful campsites in Torres del Paine (and definitely the most beautiful on the O Circuit).
In addition to campsites, Dickson features upgraded amenities like hot showers, a small store, and indoor cooking/dining area and restaurant, and camping gear rental.
Pro tip: There’s a small trail behind the campsites that leads to a beach. If you’re up for a short adventure, I strongly recommend going to the beach in the morning, when the sun hits the mountains head-on. The Dickson beach was one of the most gorgeous and tranquil places I saw during my entire time on the O Circuit. (But don’t swim–the water is freezing!)
Not many people who were staying at the campsite seemed to go to the beach (it was completely empty both times I went), so let’s just keep this as our little secret.
Perros
- Description: Forested campsite with basic amenities (buildings are still under construction)
- Booking Company: Vertice
- Amenities: Cold shower, running water, indoor cooking area
- Refugio? No
- Cost: 5,000 ($8 USD per person)
Los Perros is the third campsite on the O Circuit, located just past a glacier pass with some really stunning views of an alpine lake.
They’re currently in the process of constructing new buildings and amenities, so I would imagine that this campsite will be really nice in the next year or two. However, while we were there, it was the most basic of all of the paid campsites in the park.
At Perros, you can find an indoor cooking area, a small store, and communal bathrooms and showers with cold water only.
Paso
- Description: A bare-bones free campsite and ranger station located a few kilometers after the John Gardner Pass.
- Booking Company: CONAF
- Amenities: A single squat toilet, cooking area
- Refugio? No
- Cost: Free (with advance reservation)
The final stop on the O circuit “backside” is Paso, which is about a 6-hour (fairly treacherous) hike from Los Perros. This is a CONAF free campsite, which mean amenities are basic, but on clear days you can see excellent views of Grey Glacier peeking through the trees!
You’ll probably arrive at Paso tired from climbing the John Gartner Pass, but I’d recommend getting here early as the best campsites (near the glacier side of the campground) go really quickly. Upon arrival, you’ll need to sign in and show the ranger your reservation.
At Paso, you can expect a single squat toilet for all hikers (as you can imagine, it gets gross REALLY quickly) and a small, outdoor cooking area that gets really cramped during lunch and dinner.
But, I will admit that although we were tired and grumpy, we did make the most friends and have the most fun conversations at Paso.
Non-Trekking Torres del Paine Campsites
Pehoe
- Description: Located outside of the main O and W Trek areas, Pehoe is an independent campsite for roadtrippers to Torres del Paine
- Booking Company: Pehoe (an independent management company not connected with the others)
- Amenities: Hot showers, running water, cooking area, shop, restaurant with indoor dining, camping gear rental
- Refugio? No, but they have eco-domes
- Cost: 11,000 CLP per person
While Camping Pehoe is not part of the O or W Treks, it is an additional camping option for people who drive their own cars to Torres del Paine. Located across from Lago Nordenskold, past Pudeto bus stop, Pehoe has a stunning view of Los Cuernos that you can drive right up to.
The campsite features open tent camping, eco domes and tent rentals, and a restaurant with hot meals and indoor/outdoor seating (should you decide you don’t want to cook).
More Resources for Trekking & Camping in Torres del Paine
Phew, that was a long journey, but I hope you were able to crack the “camping in Torres del Paine” code. It’s a bit confusing but once you’re there, your efforts will definitely pay off. Now that you’re ready to embark on your Torres del Paine journey, here are a few more articles and guides you may find helpful:


Great post – thank you! Just wondering – when booking Vertice sites can you skip any? wasn’t planning on stopping at Grey but this doesn’t appear to be an option?